As an Amazon Associate I earn from qualifying purchases. This doesn't cost you anything, and I only recommend products that I totally love!

If you’ve ever had a budget that you had to stick to, but had a hard time sticking to it because most things you liked would have blown your budget, then I’m sure you’ll understand how I felt when I saw this gorgeous Pottery Barn dresser.

“Oh, that is so beautiful! That would look great in the front hall! Wait – $1800?! Bummer!”
Wouldn’t it be nice to not be limited by budgets? “$1800? No problem!” Yeah…

Meanwhile, in real life…
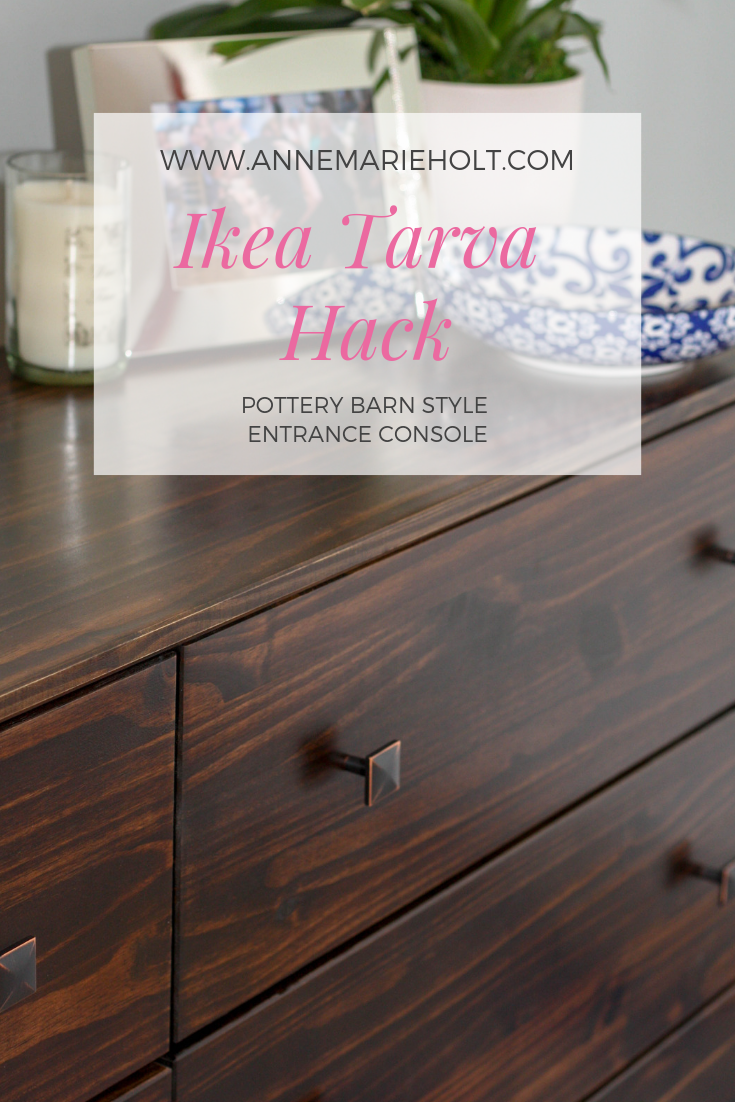
Back in reality, I didn’t want to give up so easily. Due to our recent move into a larger home, I’ve gone pretty far down the rabbit hole of Ikea furniture hacks. I knew there were certain pieces that Ikea sells which are unfinished – just plain, raw wood. Those guys are just a blank canvas, ready to become whatever you can envision! This Tarva piece had basically the same structure as the Pottery Barn one, but didn’t come with such an expensive price tag.

 I figured it didn’t need to look exactly the same, but I could use a very dark stain and get a similar look, for a fraction of the cost. After a few coats of stain and polyurathane, I had an amazing entrance table with lots of storage for winter hats, scarves, and gloves, as well as a few other household items. (Since it is close to our powder room, I keep clean hand towels there so that I can switch them out when they’re ready to be washed, so that I don’t worry if I don’t get to the laundry for a few days).

Here are my detailed steps for this Ikea Tarva hack if you’re interested in the process!
Materials for this Ikea Tarva Hack:
Ikea Tarva dresser
Stain of your choice – I used an Espresso color stain by Minwax
Polyurathane – I used this
Paint brush or rags for staining (I preferred rags because I could dispose of them, rather than needing paint thinner to clean a brush – I just used old cut up t-shirts)
Foam paint brush for polyurathane applications
Fine (220 ish) grit sanding block or paper – I used this
Dropcloth – optional, but I put one underneath in order to avoid accidentally scratching the wood
12 drawer pull knobs – also optional, but I didn’t want to use the Ikea ones, so I found these at Walmart

Steps
Step 1: Assemble the dresser body and drawers, but do not attach the knobs or install the drawers in the dresser.

Step 2: Sand the dresser and drawers (any parts that aren’t as smooth as you want them), and then wipe surface clean.
Step 3: Follow directions on your stain in order to stain to your desired color. I used 2 coats to get as dark as I was going for.

Step 4: Follow directions on your polyurathane in order to seal in the stain and protect the piece. I did 3 coats on the top of the dresser since I figured it would get the most wear, but only 2 coats on the drawers, the front, the sides, and the legs. I didn’t worry about sealing the inside of the piece, or the sides of the drawers.
Step 5: Let dry thoroughly. I even left mine outside on my front porch for a day or two, since I hate the smell of the sealant, and therefore wanted to give it time to air out a bit.
Step 6: Attach the knobs of your choice
Step 7: Install drawers and style as you’d like – you’re done!

Ta da!
This Ikea Tarva hack was really pretty easy – the hardest part for me was being patient and not rushing the time needed between each coat, since I’m not a naturally patient person. Depending on if you already have stain, seal, and brushes/rags, you can create this piece for about $200! Not only is that way better than spending $1800 when you don’t need to, but now you’ve also got a completely unique, one-of-a-kind piece that will be sure to catch people’s eye when they see it!

I’d love to hear your thoughts and see any projects you try like this! Enjoy and good luck!


Amazon and the Amazon logo are trademarks of Amazon.com, Inc, or its affiliates.


Do you mind if I quote a few of your articles as long as I provide credit and sources back
to your website? My blog site is in the very same niche as yours and my visitors would definitely benefit from some of the information you present here.
Please let me know if this okay with you. Regards!
That sounds fine – I’d love to see your blog!
Definitely an eye catching piece, and useful as well. Nice photos and step by step directions.
Thank you!!