As an Amazon Associate I earn from qualifying purchases. This doesn't cost you anything, and I only recommend products that I totally love!
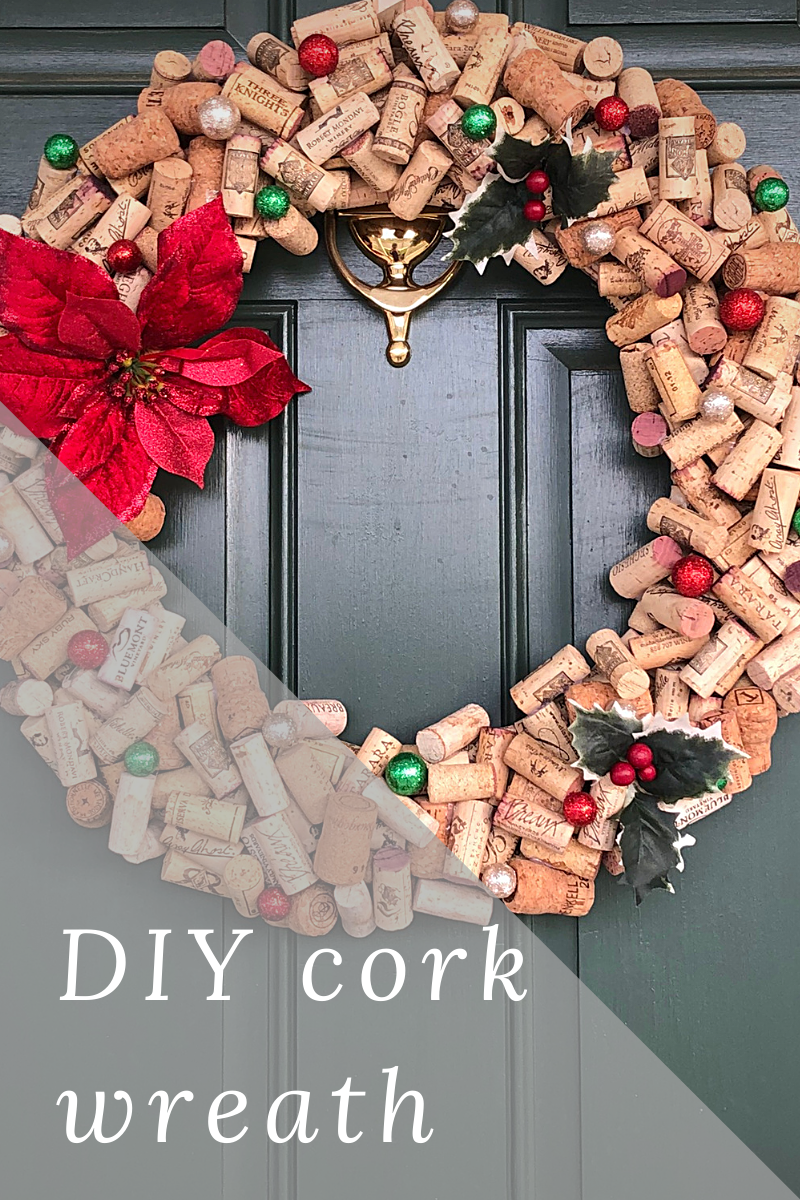
With holidays around the corner, I’ve been looking for ways to decorate the house, DIY style. Considering my business, Wine Time Crafts, I’m always looking for ways to incorporate a wine or vineyard theme into my crafting. And let’s be honest, this is 2020 – there were a decent amount of wine corks hanging around, begging to be used for something exciting. (Though to be fair, I spent the first half of 2020 pregnant, and am now nursing, so I needed to dip into the cork collection from last year, also). Enter: the cork wreath. I went with a Christmas theme for this cork wreath, but you can totally alter the decor to match your taste. Some fun ideas for other cork wreath decor would be autumn leaves for the fall or sunflowers for the summer. I also made a wine cork wreath with eucalyptus branches for something more neutral since I gave it as a gift.
This wine cork wreath is a super easy craft that only takes me about two hours to complete and you can get all your materials at your local craft store or online. It also is not very complicated, so you have lots of room to get creative and play around with it the way you’d like. Here’s what you need to know…
Materials
–wine bottle corks (a lot – probably about 200 or so. You can buy them, but it is way more fun to collect them, in my humble opinion!)
–flat wreath frame (I’ve seen larger sizes at craft stores, so make sure you’re happy with the size)
-decorations to taste
-wire or ribbon for hanging the wreath
Tools
-hot glue gun (I use a full size glue gun, and highly recommend it over a mini one, because you’ll be doing a TON of gluing)
Directions
To begin, tie your ribbon or wire around the frame so that you’ll have something strong for hanging the wreath when you’re done. It will get pretty heavy by the end!

Next, start by gluing a layer of corks flat around the whole frame. This is a great place to use the plastic corks since they aren’t as fun as the real corks. Once you have a flat layer around the frame, then glue a ring of corks around the inside and outside of the flat layer. This is also a great place to use plastic corks. Pro tip: you can cut the corks to fit so that the ring is complete, without a gap.

Once the base layer is complete, then you’ll start by randomly layering corks on top of the base layer to build a more rounded, loosely piled type of look. This can be as complex or as simple as you like. I find that I need about two or three layers of extra corks to make it look full and complete, but you can suit it to your taste.

Lastly, add your accent decorations as your finishing touches on the wreath. These cork wreaths make fantastic decor for your front door or somewhere else. I hung one on our back door in our kitchen. I’ll probably make a more neutral one for all those times in between holidays!
Enjoy – I can’t wait to hear about what you come up with!
Amazon and the Amazon logo are trademarks of Amazon.com, Inc, or its affiliates.


This is fascinating, Ms Annemarie. I love your tip about the eucalyptus. We keep a wreath in our front hall and it would be fun to swap out the different herbs and fragrances throughout the year.
Keep writing!