As an Amazon Associate I earn from qualifying purchases. This doesn't cost you anything, and I only recommend products that I totally love!
Part 1: Planning and Prep
I’m not sure about you all, but in our house, t-shirts have a way of piling up pretty fast. For me, I had quite a collection of t-shirts from races I’d run, volunteering, and college. My sophomore year of college I even made it my goal to collect as many free t-shirts as I could. By the end of the spring semester I had 14 shirts. 14. I could have gone two weeks without needing to wash any of my shirts! On the flip side, after college, t-shirts were not going to cut it at a big-girl job. Since I didn’t want to part with some of these fun shirts, I held on to them. The trouble became the fact that I was now holding on to tons of shirts I loved but hardly wore and couldn’t part with. Luckily, I knew how I could keep the shirts, and give them a new, more useful life. Enter: the t-shirt quilt. Today we start talking about how to sew a t-shirt quilt!

T-shirt quilts are great – all your memories together, like a big cozy, multifunctional scrapbook. You can picnic on it, take it to the beach, snuggle up with it outside in the cold, use it for a blanket fort, keep it on your couch as your regular throw blanket, and the list goes on. And t-shirts are durable, so with durable backing fabric, the quilt is easily washable, over and over! I even use one as a floor covering when we travel, while we’re in a hotel, so that our young daughter has a clean surface to play on, while still on the ground.

Don’t get me wrong though – sewing a t-shirt quilt is a TON of work. Seriously. If I didn’t like the finished product (or the person I was making it for!) so much, I wouldn’t do it. It isn’t necessarily that hard, it just is a lot. For that reason, I’m going to break up this tutorial about how to sew a t-shirt quilt into sections, to make the work more manageable. Just like eating an elephant, you have to go one bite at a time. So we’ll start with the first bite: Planning and prep.

Step 1: Gather your t-shirts
Collect every shirt you want to use. Make sure they are clean and dry and in good enough shape.
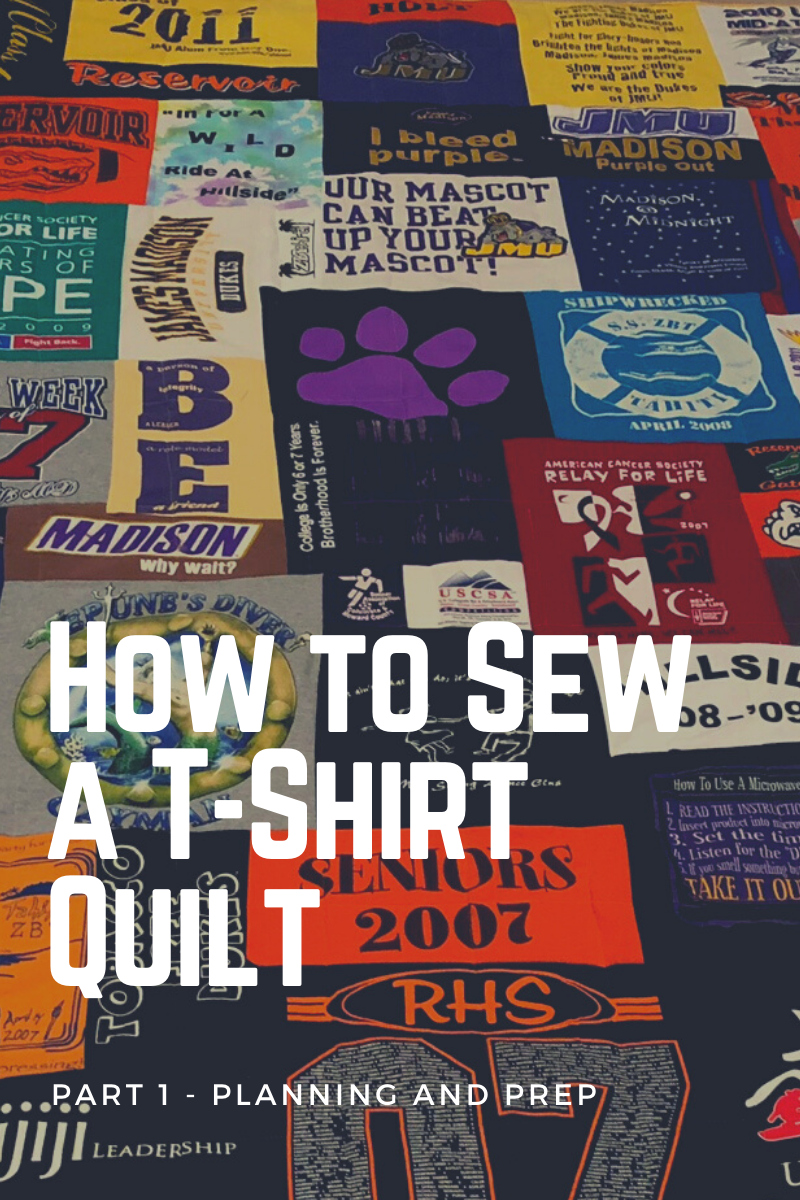
Step 2: Decide how you want the t-shirt quilt to look
I sewed my first t-shirt quilt all in columns. The second one I made was more mosaic-y, with some rows, but a lot of pieces met at very weird angles, and I swore to myself I’d never make it that complicated again. The third one was a mix – less weird angles, more rows. The quilt I’m working on now will have rows, but will also have other fabric framing each shirt, since there aren’t too many shirts to work with, but my sister wants it to be a certain size.
When deciding how you want it to look, you can fold the shirts down to the approximate size you think it will be once sewn, then play around with the layout. See how different colors look next to each other. I try to not have too much of the same color or design style too close to each other because I feel like it makes it look heavy. For the two college themed quilts I’ve done, I’ve also chosen shirts that I thought would be good “titles” to go at the top, in the center. They were shirts that had the college name nice and big and bold, with the colors I planned to use as borders and backing.
If you’re looking for some more ideas, check out these examples…
Step 3: Double check
I am the last person to tell you to wait on something once you start a project. Seriously, I’m the worst at being patient. But this part does pay off. Make sure you have all the shirts you think you might possibly want. It is easier to eliminate shirts later than it is to try to gather more once you’ve started. If you don’t have enough shirts for the size quilt you want, either wait until you have more, or decide on how you plan to create space. This is the hardest for me – choosing other fabric and deciding how to piece things together took me a long time to think about. TAKE A PICTURE of your layout so that you don’t have to recreate everything once you start cutting up your shirts.
Once you have the shirts and a general idea of your plan, the next step will be to begin preparing your shirts.
Next time we will talk about how to prepare your shirts for sewing!
Amazon and the Amazon logo are trademarks of Amazon.com, Inc, or its affiliates.


One thought on “How to Sew a T-Shirt Quilt”
Comments are closed.