As an Amazon Associate I earn from qualifying purchases. This doesn't cost you anything, and I only recommend products that I totally love!
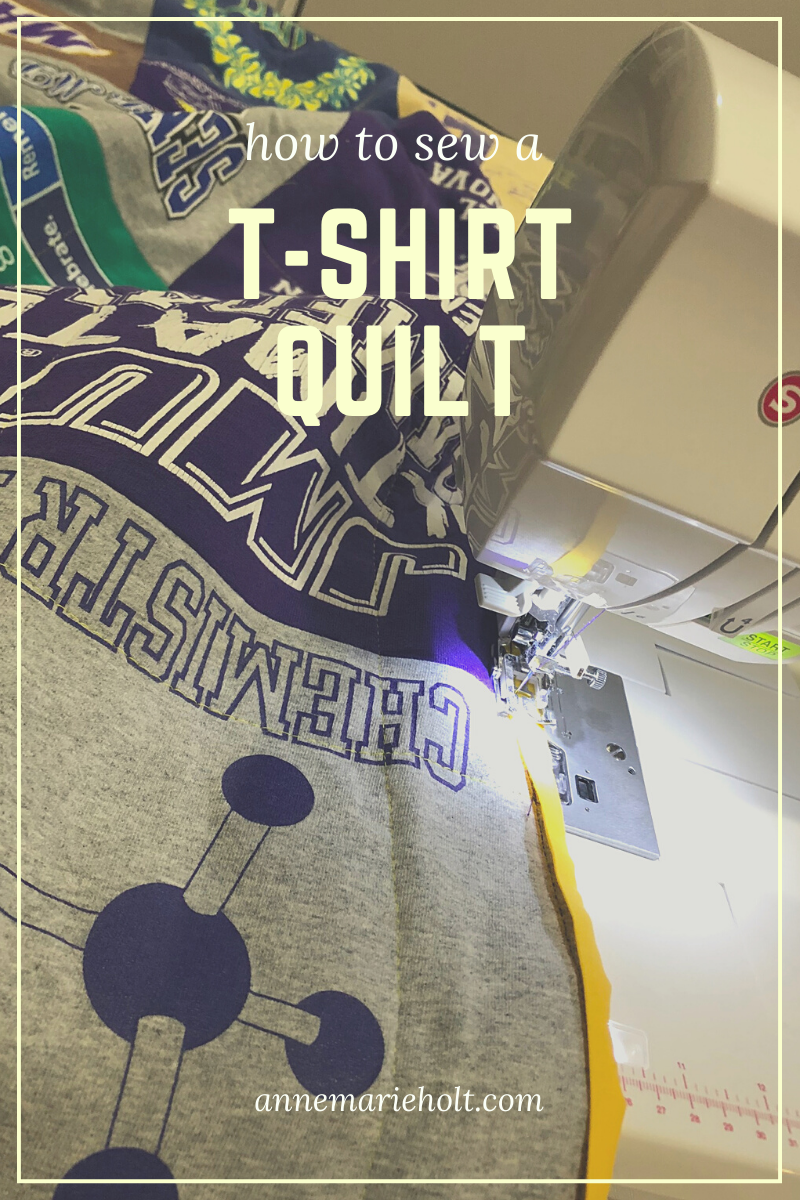
Part 3: Sewing Your Shirts Together
Hi there! This is the third post in my series about sewing a t-shirt quilt. If you’re starting from the very beginning, check out post 1 about planning, and post 2 about preparing your shirts. Today we’re talking about sewing your t-shirts together.

Before you begin though, here is one more important thing to think about. Once you’re done sewing all your t-shirts together, the next steps will be to layer your batting (the fluff in the middle) and the fabric on the back side of your quilt, secure them, and then sew it down. Depending on the size of the quilt, that part is the biggest challenge. You have some options for it though.
Options
Option 1 is to send your quilt off to be quilted by a long-arm quilter. They have a special machine that can reach and cover more of the quilt without it bunching. They can also do lots of custom designs in the stitching. Depending on the size and intricacy of the stitching, the pricing will range accordingly. I’ve never done this but it sounds luxurious to be able to not have to wrestle a huge quilt into the tiny space in my machine and hunch over it.
Option 2 is to quilt smaller sections of the design and batting, then piece them together and attach the backing at the end. This is called Quilt As You Go (QAYG). I’ve also never done this but I am going to with the quilt I am doing now, for my sister. I’ll update this post after I’ve done it to let you know how it goes! It seems like a good option for quilts that are going to be pretty large.
Option 3 is probably the most common and straightforward method. Start by making your quilt sandwich, secure it, and then quilt it yourself, using any number of methods. You can sew straight lines at even (or uneven!) intervals vertically and horizontally across the whole quilt. You can use free motion quilting to quilt the whole surface, or you can even “tie” corners down by hand by stitching small little x shapes into corners of seams of shirts.

I’ve done all of these on different quilts. Doing hand ties is definitely the easiest and fastest in my opinion. I found free motion quilting to be the most fun and interesting because it didn’t truly matter if I messed up. There wasn’t supposed to be any specific design I was going for so I relaxed about it the most. Stitching straight lines was the most frustrating because I had this huge quilt that I was trying to sew straight lines down and keep them evenly spaced but the quilt was super heavy and the space in my machine was pretty small so sewing in the middle of the quilt was really difficult. I also didn’t have enough quilting pins so I kept scratching my arms with straight pins. Not fun, 1/10, would not recommend for a quilt that large.
Essentially, you need to secure the three layers (top, batting, and back) so that the layers don’t shift and bunch up somewhere over time. It also helps distribute pressure across all the seams, instead of leaving too much strain on certain seams, leading to them disintegrating and tearing over time. The reason you should consider this before sewing your top layer is because particularly if you’re going to QAYG, then you’ll be sewing sections, then layering with batting and quilting it. At the end is when you’ll attach the bigger pieces and have your finished top, not making the entire top and then layering the whole thing on the batting. Totally your call, based on your comfort level with sewing and quilting.
Once you’ve decided how you plan to quilt, it is time to start sewing!
Materials/tools you’ll need:
Sewing machine – I use a SINGER Quantum Stylist 9960 and it has been very good to me
Thread – the color thread here doesn’t matter too much since it won’t be seen
Scissors – good quality fabric scissors help tremendously
Sewing Pins – for holding your shirts in place as you sew them together
Seam Ripper – trust me, at some point in this project you’ll have a seam that needs to be torn out and redone
Quilting Squares– not technically necessary for this step but I find them helpful for sizing my pieces and making sure I have straight lines
Fabric Pen – Also not necessary but I like using the pen to mark a straight line to sew
T-shirts – prepped with interfacing and ready to sew
Directions:
Step 1: Sew the smaller pieces together
If you have two shirts that are smaller that will need to both attach to another, sew all those guys together first.

Step 1.5: Quilt as you go
If you’re quilting as you go, this is where you’d sew your sections. Then you’d layer it with batting, quilt it, then move on to your next section. Up to you.
Step 2: Sew shirts to make rows or columns
Sew your shirts in rows or columns, taking care to line designs up the way you want. I don’t really follow a specific seam allowance during this process. I just trace a line where I need to sew. The ink disappears after a few hours, and it also washes out.
Step 3: Sew rows or columns together

Pin your rows together and stitch. Pay attention to where seams meet. Fold them in opposite directions as you go, so that the intersection isn’t as bulky. Keep going until you have your whole front completed!
It’s not many steps, but a lot to keep in mind and plan for! As I sew, I am constantly lining up the rows or columns to make sure things are lining up where I want them to. If needed, I stitch the pieces closer together or I tear out and redo. I’ve also added little bits of fabric here and there when I need a few extra inches to make the pieces match where they need to. This is NOT an exact science, as far as I’m concerned. It can be really tricky when shirts have designs that are warped, or printed too high to the collar or the seam of the sleeve. Sometimes it doesn’t leave you a little wiggle room. That is the part that makes me relax a little – just like a t-shirt itself, a t-shirt quilt is not a super formal piece that needs to be perfect. You love the shirts, that’s the point of saving them. Each quilt I’ve made has had at least one piece that was too close to a seam and got cut off or something. It happens!
Now your top is done! You can finally see what you’ve been working towards! Next time we’ll work through building and quilting it all. Happy sewing!
Amazon and the Amazon logo are trademarks of Amazon.com, Inc, or its affiliates.
2 thoughts on “How to Sew a T-Shirt Quilt”
Comments are closed.